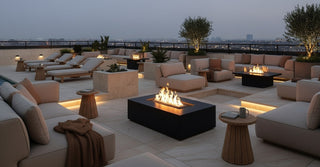
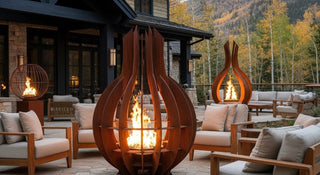
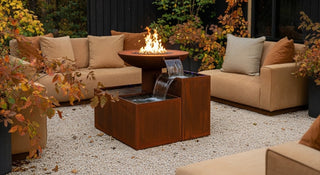
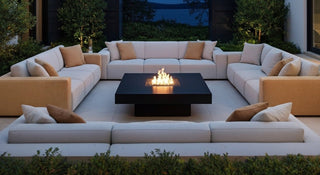
Designing and installing a fire feature can be an exciting project that can transform your backyard into a beautiful and inviting space. This post will guide you through each step, ensuring a safe, efficient, and enjoyable process.
Step 1: Planning and Preparation
Before diving into purchasing materials, it's important to solidify your plan. Here's what you should consider:
-
Define Your Needs: Determine the purpose of your fire feature. Will it be for warmth, cooking, or ambiance? This will help you decide the size, style, and fuel type. Here are some interesting facts to consider when choosing a fuel type:
- Natural Gas: A convenient and clean-burning option, natural gas fires can be easily controlled with a knob or switch. However, they require a professional installation to ensure a safe gas line connection.
- Propane: Another popular choice, propane fire pits are versatile and can be easily moved around your patio. Keep in mind that propane tanks need to be refilled periodically.
-
Wood: Fire features fueled by wood offer a classic aesthetic and the nostalgic crackle of a campfire. However, they require storing firewood and can produce smoke.
-
Measure Your Space: Measure the area where you plan to install the fire feature. Make sure you have enough room for safe clearances. The National Fire Protection Association (NFPA) recommends keeping at least 36 inches of clearance between a fire feature and combustible materials like fences, trees, or buildings.
-
Choose a Location: Select a safe and suitable spot away from flammable materials. Ensure that it is level and well-ventilated. Here are some additional tips for choosing a location:
- Avoid placing your fire feature under overhanging eaves or trees.
- Don't position it on a wooden deck or patio.
- Keep it away from high-traffic areas to prevent accidents.
-
Check Local Codes: Fire regulations can vary depending on your location. Check with your local municipality to ensure that you are allowed to install and operate your desired fire feature.
-
Determine Your Budget: Set a realistic budget that includes all materials, labor, and accessories.
Step 2: Choosing Your Fire Feature
With a plan in mind, it's time to choose the perfect fire feature for your space.
-
Select a Style: Browse various styles and materials to find the fire feature that best suits your aesthetic and practical needs. Fire features come in a variety of shapes, sizes, and materials, including:
- Fire pits: A classic and versatile option, fire pits are perfect for gathering around and enjoying a warm fire.
- Fire tables: Fire tables offer a multi-functional feature, providing a fire pit in the center of a tabletop surface - perfect for placing drinks or roasting marshmallows.
- Fire bowls: Often made of metal or concrete, fire bowls create a modern and sleek look.
- Built-in fire features: For a permanent and luxurious addition to your patio, consider a built-in fire feature.
-
Material Selection: Choose durable and weather-resistant materials, such as GFRC concrete, powder-coated metal, Corten steel, or stainless steel.
-
Burner System: Choose a burner with the appropriate BTU output, size, and shape for your fire pit or fire table. BTU stands for British Thermal Unit and measures the amount of heat a burner can produce.
-
Fuel Type: Decide whether you prefer wood, natural gas, or liquid propane. Consider the pros and cons of each fuel type as discussed in Step 1.
-
Select Accessories: Decide on any accessories you want, including covers, lids, wind guards, and fire media. Fire media, such as fire glass or lava rocks, can add a decorative touch to your fire feature and help to disperse heat evenly.
Step 3: Installation (Continued)
- Fire Plate (Gas Fire Features Only): Gas fire pits typically utilize a fire plate or pan, often made of aluminum or stainless steel. This component houses the burner and provides a surface for the fire media. Ensure the plate has proper drainage to prevent water buildup.
Step 4: Burner Installation (Gas Fire Features Only)
This section applies specifically to gas fire features. Wood-burning fire pits have simpler installation requirements.
- Burner Placement: Position the burner within the fire plate according to the manufacturer's instructions. Proper placement is crucial for optimal flame appearance and safety.
- Connecting Gas Lines: This is where professional help is strongly advised. Incorrect gas line connections can lead to dangerous leaks. If you're undertaking this yourself, ensure you use appropriate gas-rated piping and fittings, and meticulously check for leaks using a soapy water solution. Bubbles indicate a leak.
-
Ignition System: Several ignition systems are available:
- Match Lit: The simplest and most economical option, requiring a long lighter or match to ignite the gas.
- Spark Ignition: Uses a push-button igniter to create a spark that ignites the gas.
- Electronic Ignition: Offers convenient push-button or remote control ignition. Some systems even include automatic reignition in case the flame is extinguished by wind.
- Automatic Ignition with Flame Sensing: The most sophisticated option, these systems automatically ignite the gas and monitor the flame. If the flame goes out, the gas supply is automatically shut off for safety.
Step 5: Finishing Touches
-
Fire Media: Adding fire glass, lava rock, or other approved fire media enhances the aesthetic appeal and distributes heat more evenly.
- Fire Glass: Made from tempered glass, fire glass comes in various colors and shapes, adding a modern and elegant touch. It reflects the flames, creating a mesmerizing effect.
- Lava Rock: A natural and porous volcanic rock, lava rock provides a rustic look and retains heat well.
- Log Sets (for Gas Fire Features): Ceramic log sets mimic the appearance of real wood logs, adding a traditional touch to gas fire features.
Important Safety Note: Never use materials not specifically designed for fire features as fire media. They could explode or release harmful fumes.
Step 6: Testing and Enjoyment
- Leak Test (Gas Fire Features): Before the first use, and periodically thereafter, perform a leak test using soapy water on all gas connections.
- Initial Burn: Light the fire feature according to the manufacturer's instructions. Start with a low flame and gradually increase it to the desired level.
- Observe Flame Pattern: Ensure the flames are burning evenly and consistently. An uneven or yellow flame could indicate a problem with the burner or gas supply.
- Enjoy Responsibly: Always supervise the fire feature while it's in use and never leave it unattended. Keep a fire extinguisher or garden hose nearby in case of emergencies.
Interesting Facts and Further Considerations:
- BTUs and Heating Capacity: BTU (British Thermal Unit) measures the heat output of a burner. Higher BTUs mean more heat. Consider the size of your space and desired warmth when choosing a burner.
- Wind and Flame Height: Wind can affect the flame height and direction. Wind guards can help mitigate this issue.
- Maintenance: Regular cleaning and maintenance are essential for optimal performance and longevity. Remove debris, check connections, and inspect the burner regularly.
- Environmental Impact: Consider the environmental impact of your chosen fuel type. Natural gas and propane burn cleaner than wood, producing fewer emissions.
By following these steps and considering these important factors, you can confidently design, install, and enjoy a beautiful and safe fire feature that will enhance your outdoor living space for years to come. Remember, when in doubt, consult with a qualified professional.


